Build your own Roastmark temperature probe
An ESP32-C6 with two K-type thermocouples that wirelessly streams bean and environment temperature to the Roastmark app via Bluetooth.
1. Parts list
Everything can be sourced from AliExpress, Amazon, or similar electronics suppliers. No soldering is required if you use the breakout board modules — just jumper wires.
| Part | Qty | Notes |
|---|---|---|
| ESP32-C6 development board Seeed Studio XIAO ESP32C6 or similar | 1 | Must be C6 (not C3) for BLE 5.0 + good range. The XIAO is tiny and cheap. |
| MAX6675 breakout module Includes header pins | 2 | One for bean temp, one for environment temp. Works with 1 if you only need BT. |
| K-type thermocouple Usually bundled with MAX6675 modules | 2 | Standard probes work for ambient roasting temps up to ~400 °C |
| Jumper wires (female-to-female) | 7 | For connecting MAX6675 modules to ESP32 pins |
| USB-C cable | 1 | For flashing firmware and powering the board |
| Breadboard (optional) | 1 | Makes wiring cleaner. Not required if wiring directly. |
2. Wiring
Both MAX6675 modules share the same clock (SCK) and data (SO) lines. Only the chip select (CS) pin is different — this tells the ESP32 which probe to read.
| MAX6675 pin | Bean probe (BT) | Env probe (ET) |
|---|---|---|
| VCC | 3.3V |
3.3V |
| GND | GND |
GND |
| SCK | D8 (shared) |
D8 (shared) |
| SO | D9 (shared) |
D9 (shared) |
| CS | D3 |
D4 |
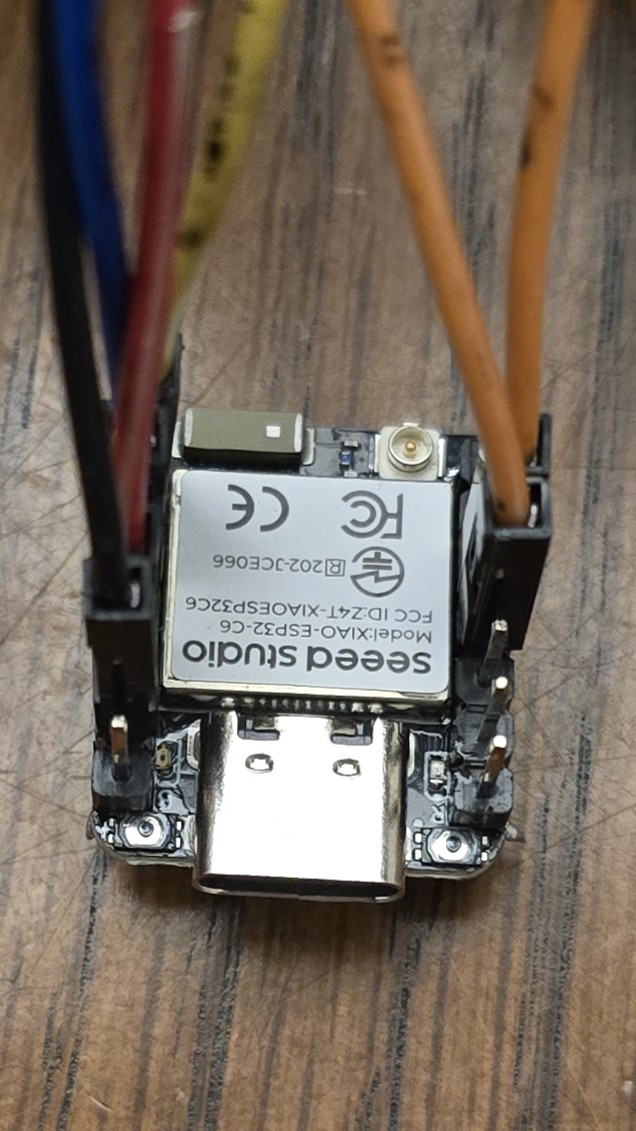
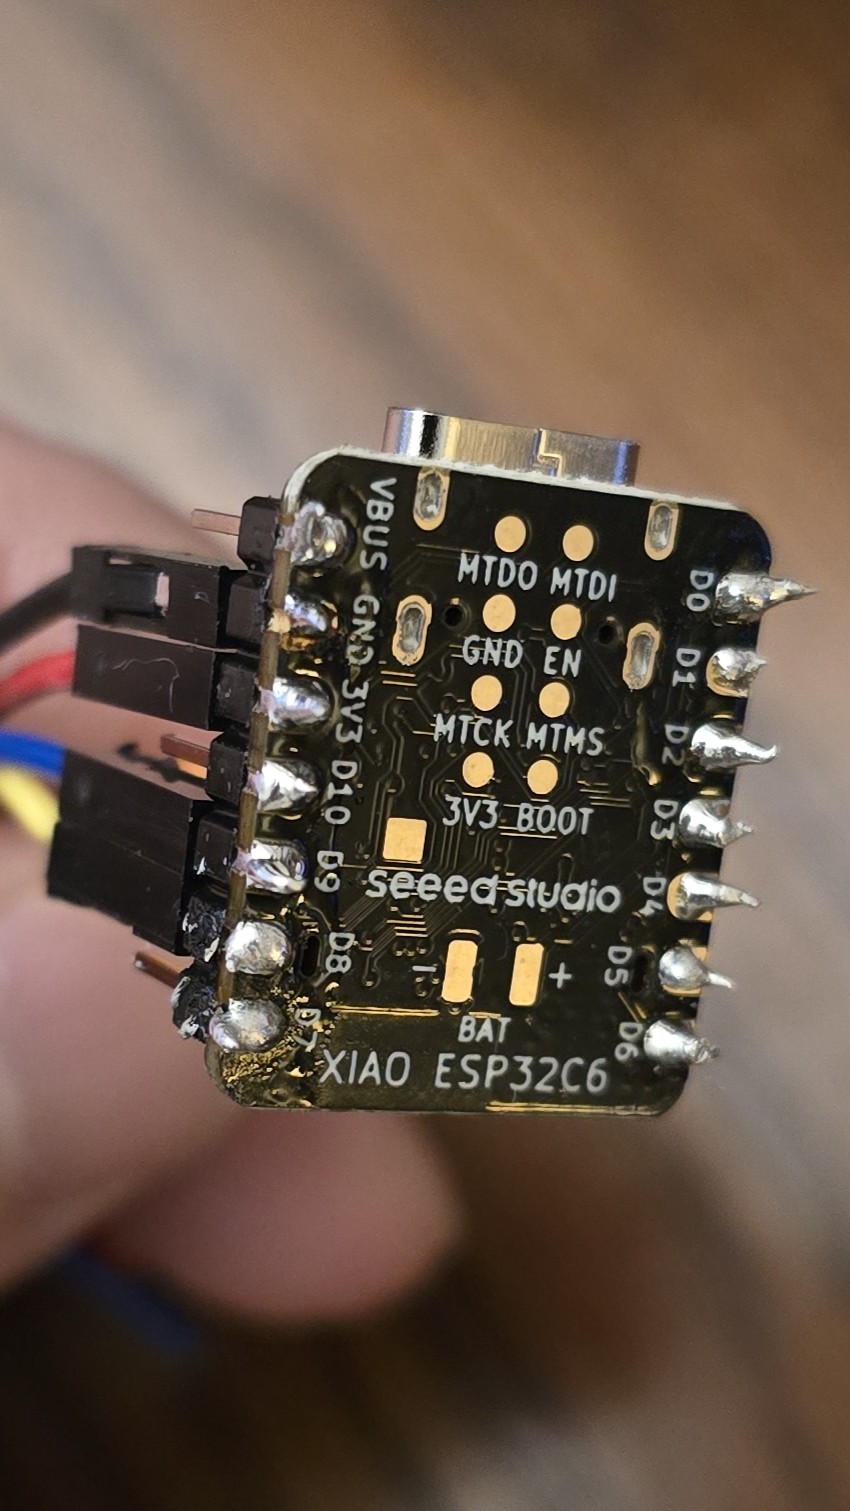
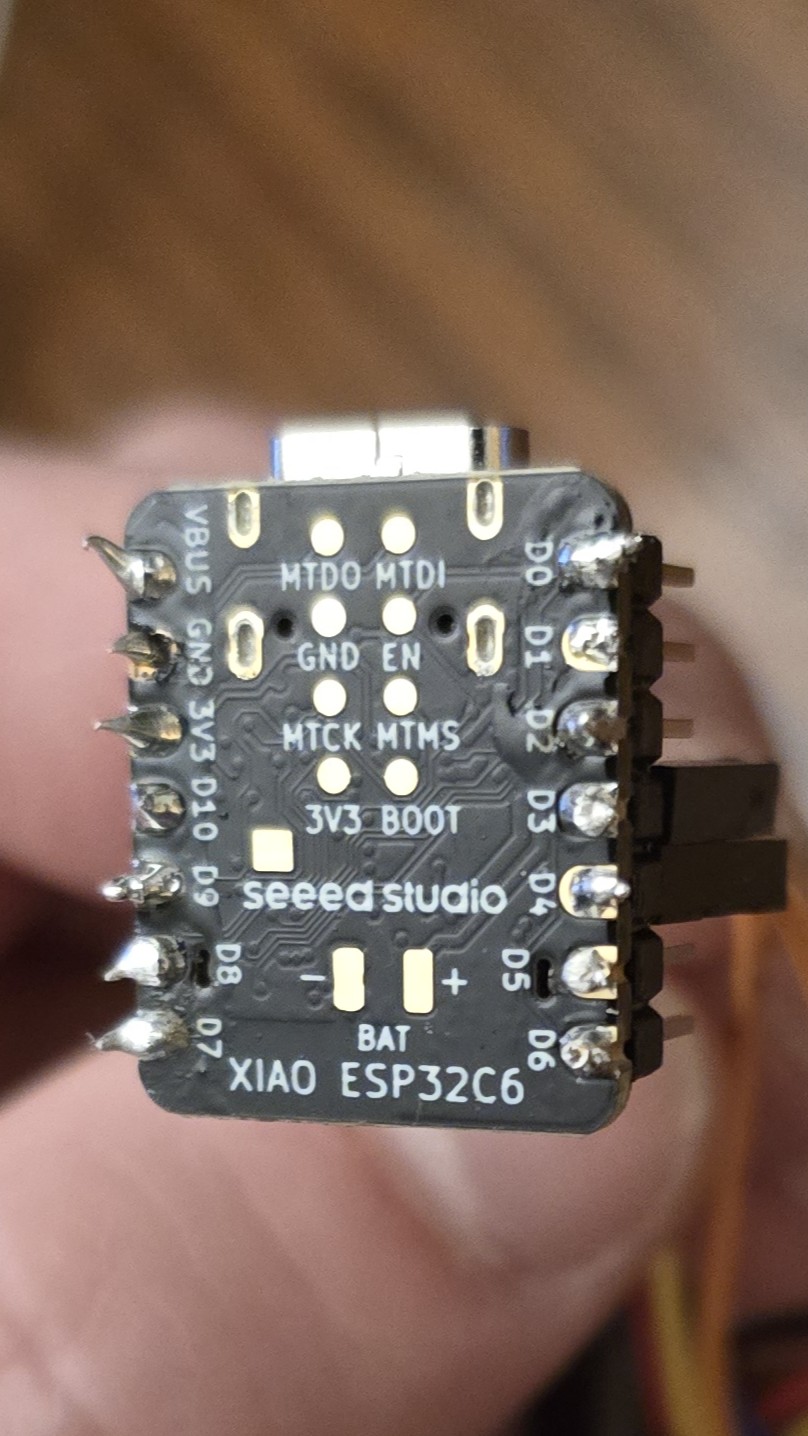
3. Reference photos
Here's what the actual build looks like using a Seeed Studio XIAO ESP32C6 and two MAX6675 modules (excuse the soldering — it's not pretty, but it works). For reference, the wire colours I used: black for GND, red for 3.3V/VCC, blue for D9/SO, yellow for D8/SCK, and orange for D3/CS1 and D4/CS2.
The board
The thermocouple modules
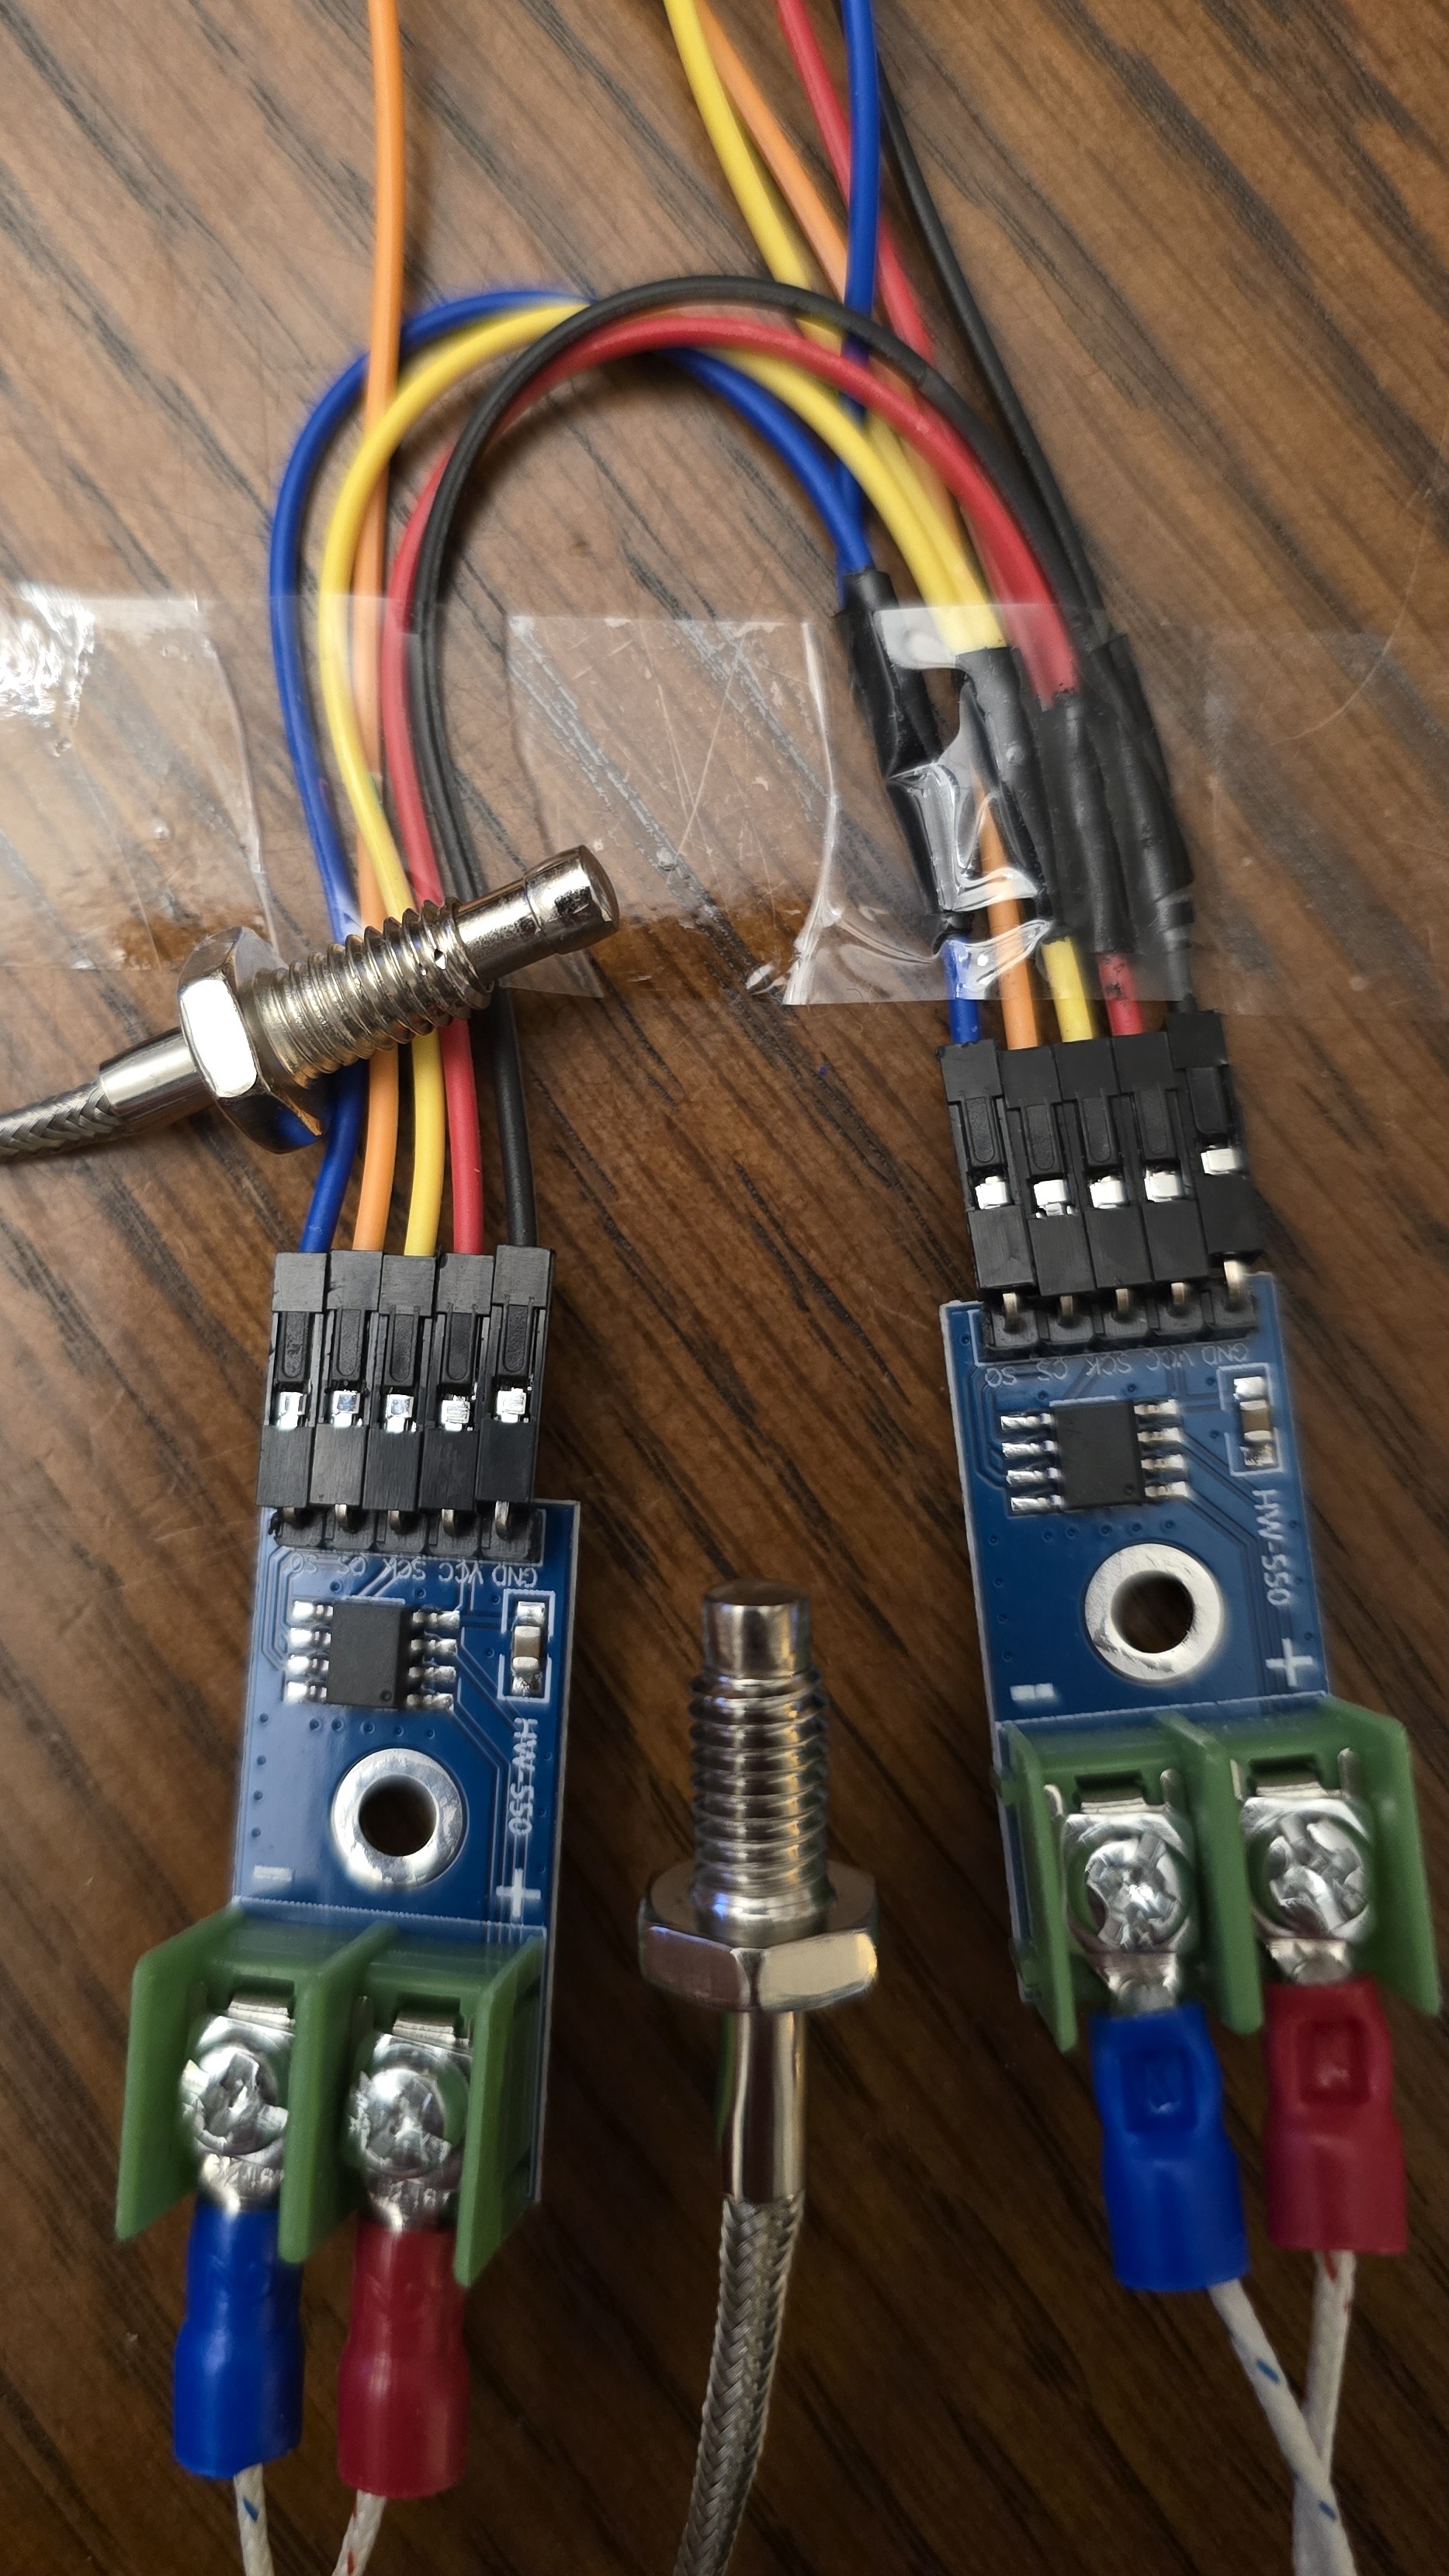
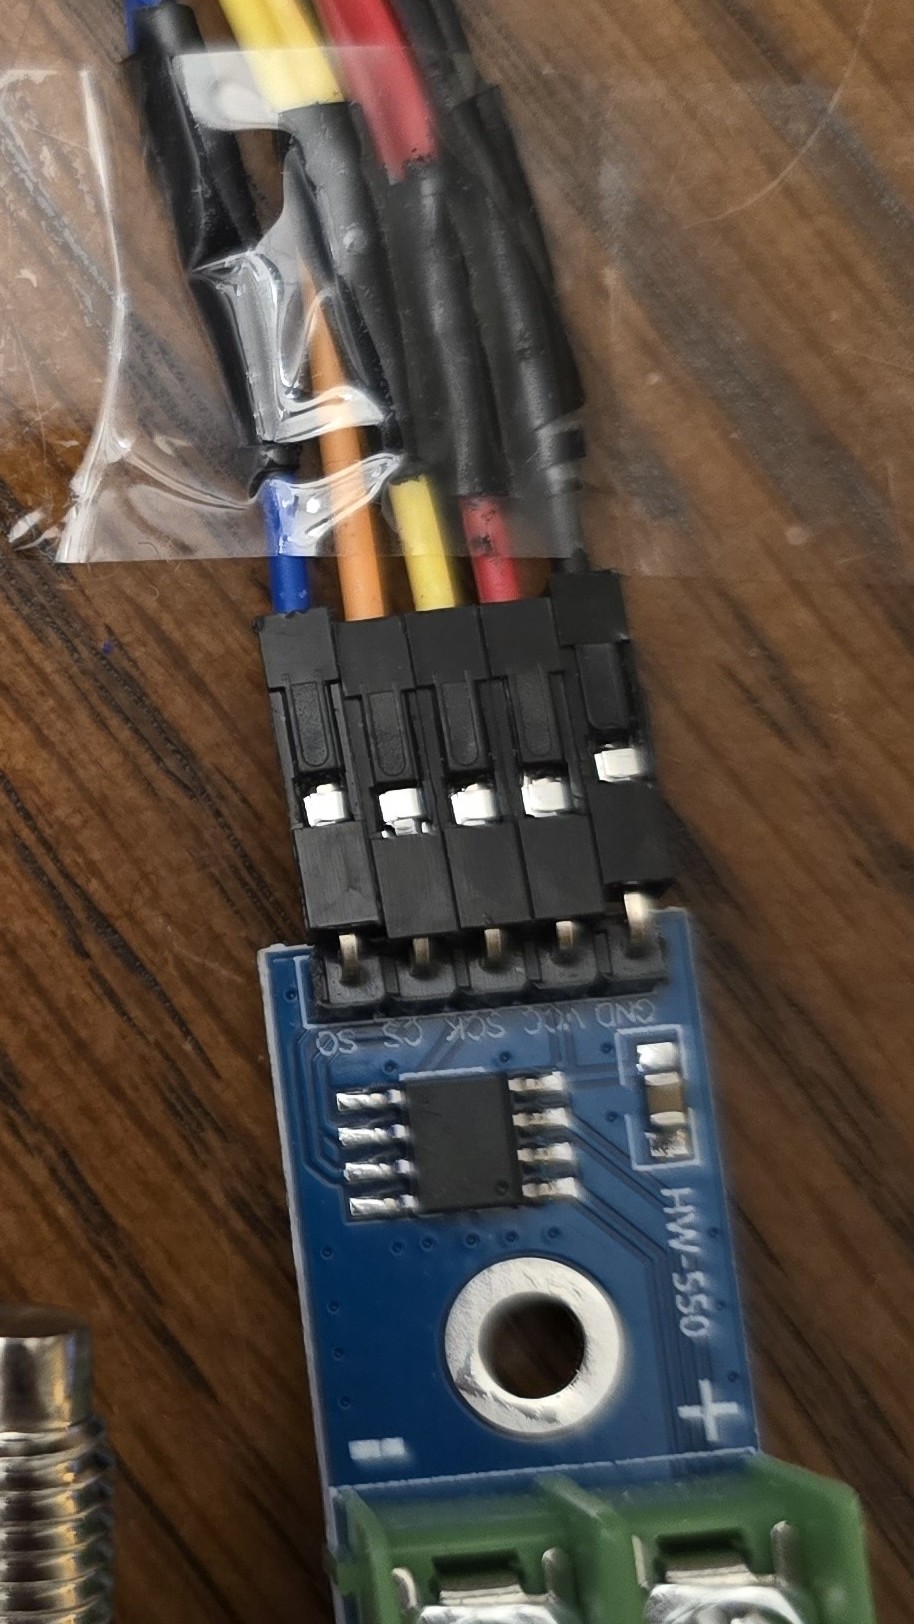
A note on shared connections
Four of the wires are shared between both MAX6675 modules (VCC, GND, SCK, SO), which means you need to split one wire into two at those pins. There are a few ways to handle this:
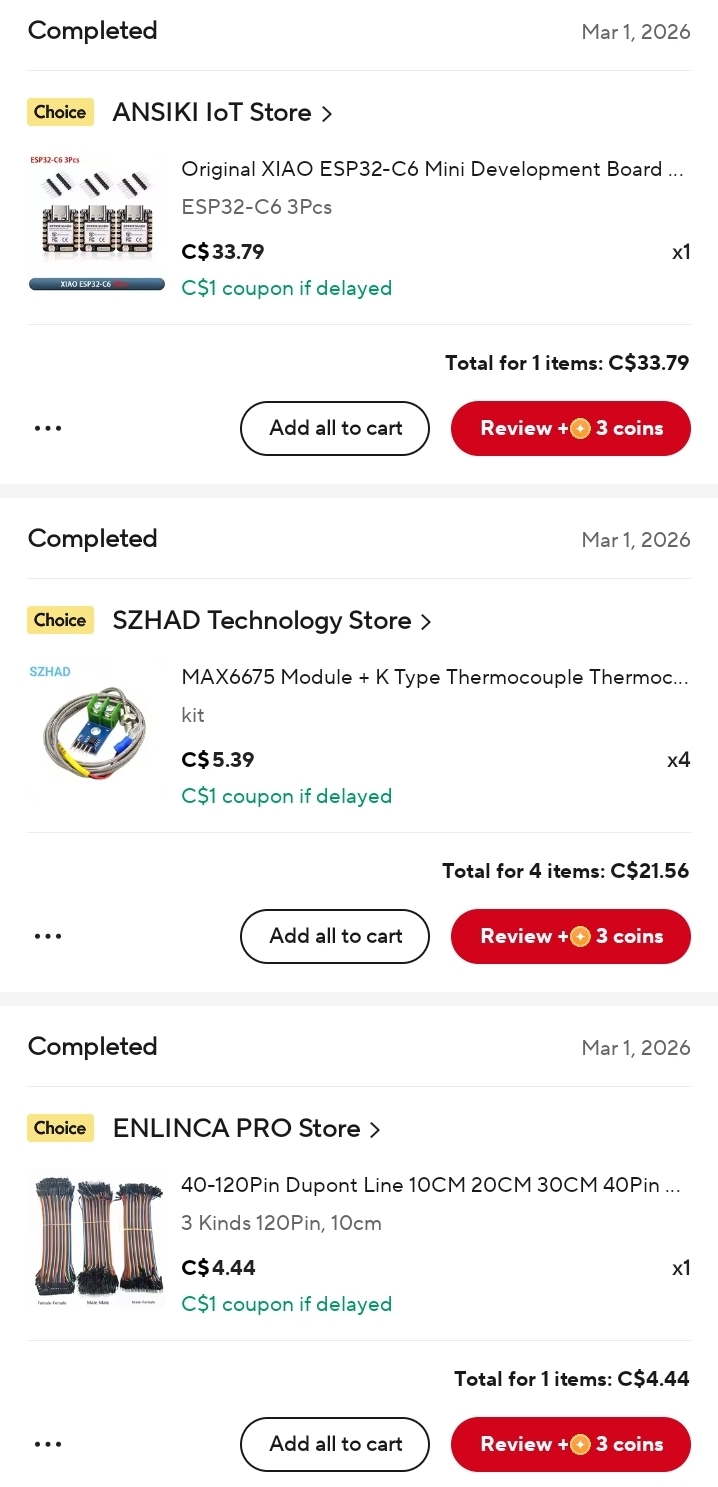
What it costs
4. Flash the firmware
The firmware is a standard Arduino sketch. You'll need the Arduino IDE (or PlatformIO) with ESP32 board support.
Setup Arduino IDE
- Install Arduino IDE 2.x Download from arduino.cc if you haven't already.
-
Add ESP32 board support
Go to File → Preferences, and add this URL to "Additional Board Manager URLs":
https://espressif.github.io/arduino-esp32/package_esp32_index.json
Then open Tools → Board → Board Manager, search for esp32 by Espressif, and install it. - Install the MAX6675 library Go to Sketch → Include Library → Manage Libraries, search for MAX6675 (by Adafruit), and install it.
- Select your board Go to Tools → Board and select ESP32C6 Dev Module. Set USB CDC On Boot to Enabled (so Serial Monitor works over USB).
- Create a new sketch and paste the code In Arduino IDE, go to File → New Sketch. Delete the default contents, then copy and paste the entire sketch below. Save it, connect your ESP32-C6 via USB-C, select the correct port under Tools → Port, and click Upload.
The sketch
#include <max6675.h>
#include <BLEDevice.h>
#include <BLEServer.h>
#include <BLEUtils.h>
#include <BLE2902.h>

// =========================
// MAX6675 pin setup
// =========================

// Shared SPI-style lines
const int thermoSO   = D9;  // SO / MISO shared
const int thermoSCK  = D8;  // SCK shared

// Separate chip select pins
const int beanCS     = D3;  // Probe 1 = Bean Temp
const int envCS      = D4;  // Probe 2 = Env Temp

MAX6675 beanProbe(thermoSCK, beanCS, thermoSO);
MAX6675 envProbe(thermoSCK, envCS, thermoSO);

// =========================
// BLE UUIDs
// =========================
#define SERVICE_UUID       "7E100001-3D7A-4B6F-9E1C-6B1A5A100001"
#define BT_CHAR_UUID       "7E100002-3D7A-4B6F-9E1C-6B1A5A100002"
#define ET_CHAR_UUID       "7E100003-3D7A-4B6F-9E1C-6B1A5A100003"
#define STATUS_CHAR_UUID   "7E100004-3D7A-4B6F-9E1C-6B1A5A100004"

BLECharacteristic* btCharacteristic;
BLECharacteristic* etCharacteristic;
BLECharacteristic* statusCharacteristic;

bool deviceConnected = false;

// =========================
// BLE callbacks
// =========================
class ServerCallbacks : public BLEServerCallbacks {
  void onConnect(BLEServer* pServer) override {
    deviceConnected = true;
    Serial.println("BLE client connected");
  }

  void onDisconnect(BLEServer* pServer) override {
    deviceConnected = false;
    Serial.println("BLE client disconnected");
    BLEDevice::startAdvertising();
    Serial.println("Advertising restarted");
  }
};

// =========================
// Helper functions
// =========================
bool isValidTemp(float t) {
  return !isnan(t) && t > -20.0 && t < 1200.0;
}

void setCharacteristicFloat(BLECharacteristic* characteristic, float value) {
  char buffer[16];
  dtostrf(value, 0, 2, buffer);
  characteristic->setValue(buffer);
}

void setupBLE() {
  BLEDevice::init("Roastmark Probe");

  BLEServer* server = BLEDevice::createServer();
  server->setCallbacks(new ServerCallbacks());

  BLEService* service = server->createService(SERVICE_UUID);

  btCharacteristic = service->createCharacteristic(
    BT_CHAR_UUID,
    BLECharacteristic::PROPERTY_READ |
    BLECharacteristic::PROPERTY_NOTIFY
  );
  btCharacteristic->addDescriptor(new BLE2902());
  btCharacteristic->setValue("0.00");

  etCharacteristic = service->createCharacteristic(
    ET_CHAR_UUID,
    BLECharacteristic::PROPERTY_READ |
    BLECharacteristic::PROPERTY_NOTIFY
  );
  etCharacteristic->addDescriptor(new BLE2902());
  etCharacteristic->setValue("NaN");

  statusCharacteristic = service->createCharacteristic(
    STATUS_CHAR_UUID,
    BLECharacteristic::PROPERTY_READ |
    BLECharacteristic::PROPERTY_NOTIFY
  );
  statusCharacteristic->addDescriptor(new BLE2902());
  statusCharacteristic->setValue("BT:0 ET:missing");

  service->start();

  BLEAdvertising* advertising = BLEDevice::getAdvertising();
  advertising->addServiceUUID(SERVICE_UUID);
  advertising->setScanResponse(true);
  BLEDevice::startAdvertising();

  Serial.println("BLE advertising as: Roastmark Probe");
}

// =========================
// Setup
// =========================
void setup() {
  Serial.begin(115200);
  delay(1000);

  Serial.println("Starting Roastmark 2-probe BLE firmware...");
  Serial.println("Bean probe: SCK=D8 CS=D3 SO=D9");
  Serial.println("Env  probe: SCK=D8 CS=D4 SO=D9");
  Serial.println("Probe 2 can be missing for now.");

  delay(500);
  setupBLE();
}

// =========================
// Main loop
// =========================
void loop() {
  float beanTemp = beanProbe.readCelsius();
  float envTemp  = envProbe.readCelsius();

  bool beanOk = isValidTemp(beanTemp);
  bool envOk  = isValidTemp(envTemp);

  // Serial output
  Serial.print("BT: ");
  if (beanOk) {
    Serial.print(beanTemp, 2);
    Serial.print(" C");
  } else {
    Serial.print("invalid");
  }

  Serial.print(" | ET: ");
  if (envOk) {
    Serial.print(envTemp, 2);
    Serial.println(" C");
  } else {
    Serial.println("missing/invalid");
  }

  // Update BT characteristic
  if (beanOk) {
    setCharacteristicFloat(btCharacteristic, beanTemp);
  } else {
    btCharacteristic->setValue("NaN");
  }

  // Update ET characteristic
  if (envOk) {
    setCharacteristicFloat(etCharacteristic, envTemp);
  } else {
    etCharacteristic->setValue("NaN");
  }

  // Update status characteristic
  String status = "BT:";
  status += beanOk ? "ok" : "bad";
  status += " ET:";
  status += envOk ? "ok" : "missing";
  statusCharacteristic->setValue(status.c_str());

  // Notify connected client
  if (deviceConnected) {
    btCharacteristic->notify();
    etCharacteristic->notify();
    statusCharacteristic->notify();
  }

  delay(1000);  // update once per second
}
Verify it works
Open Tools → Serial Monitor at 115200 baud. You should see output like:
Starting Roastmark 2-probe BLE firmware...
Bean probe: SCK=D8 CS=D3 SO=D9
Env  probe: SCK=D8 CS=D4 SO=D9
BLE advertising as: Roastmark Probe
BT: 24.50 C | ET: 25.10 C
BT: 24.75 C | ET: 25.00 C5. Connect to the app
Once the firmware is running and you see temperature readings in Serial Monitor, the probe is ready to pair.
- Open the Roastmark app On your Android device, open the app and start a new roast.
- Tap "Show" on the probe panel At the top of the roasting screen, you'll see the Bluetooth probe status bar. Tap Show to expand it.
- Tap "Scan & Connect" The app will scan for nearby BLE devices. It looks specifically for a device named "Roastmark Probe" — your ESP32.
- Auto-logging starts Once connected, the probe panel minimizes and shows live BT/ET readings. Temperature is automatically logged every second while the roast timer is running.